

At the Initial Battle of El Alamein in 1942, you’ll find that the British Eighth Army, led by General Auchinleck, made a significant stand against Rommel’s Axis forces, halting their advance at Egypt’s doorstep. They used minefields and strategic terrain to create a robust defense. Despite Rommel’s initial advantage with his Panzer divisions, the British held strong, forcing a stalemate. This critical moment allowed the British to regroup for future success. Uncover untold details on this essential standoff.
Background and Strategic Importance
As the summer of 1942 unfolded, the Initial Battle of El Alamein emerged as a significant moment in World War II, fundamentally influencing the course of the North African campaign.
You find the British Eighth Army, under General Claude Auchinleck, making a key defensive stand against the Axis powers led by Field Marshal Erwin Rommel. This battle’s strategic significance lay in halting Rommel’s advance, protecting essential supply routes, and safeguarding the Suez Canal.
With their backs against the wall, the British used defensive positions reinforced by minefields and natural terrain, effectively creating a formidable line. Despite being outnumbered, they held their ground, resulting in a stalemate.
This allowed them to regroup and reinforce for future offensives, marking a turning point in North Africa.
Retreat From Gazala and Aftermath

After suffering a defeat at the Battle of Gazala in June 1942, the British Eighth Army retreated into north-western Egypt, reaching Mersa Matruh. They couldn’t hold the Egyptian border defenses due to the lack of armored units, leaving infantry vulnerable. This forced a defensive strategy relying on infantry covering minefields to slow the Axis advance.
General Claude Auchinleck took command of the Eighth Army on June 25, 1942, and organized a defense near El Alamein, about 160 kilometers east. Here, the British forces, including the 10th Indian and 50th (Northumbrian) Infantry Divisions, established a significant defensive position.
This move aimed to halt the Axis advance towards Alexandria and protect the strategically essential Suez Canal, setting the stage for the initial Battle of El Alamein.
Defensive Preparations at El Alamein
Although the situation was dire, General Claude Auchinleck took decisive action to fortify the British Eighth Army at El Alamein. He skillfully used the natural terrain to create strong defensive preparations against the advancing Axis forces. The 10th Indian Infantry Division, alongside other key units like the 50th (Northumbrian) Infantry Division, played an essential role in these efforts.
Minefields were strategically laid to halt enemy progress, with infantry units positioned to protect these barriers. Auchinleck’s strategic withdrawal to El Alamein allowed for the accumulation of supply lines and reinforcements, enhancing the British position. The 1st Armoured Division’s deployment in the open desert to the south guaranteed supplementary support, countering potential Axis flanking maneuvers effectively.
Axis Forces and Rommel’s Strategy
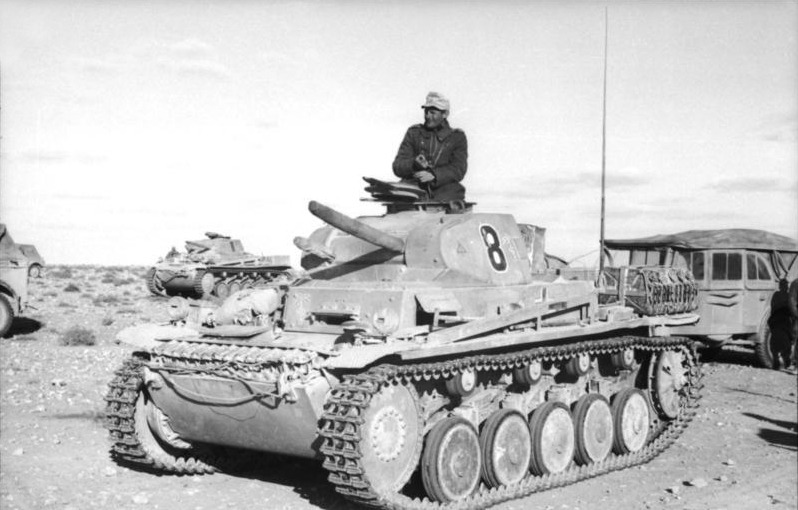
Image: Federal Archives, Image 101I-783-0110-12 / Dörner / CC-BY-SA 3.0, Federal Archives Image 101I-783-0110-12, North Africa, Panzer II, Motor Vehicles, CC BY-SA 3.0 DE
While the British forces fortified their positions, the Axis powers, led by Field Marshal Erwin Rommel, prepared an aggressive strategy to seize control of North Africa.
Rommel, commanding the German Afrika Korps and Italian troops, aimed to utilize the mobility of his Panzer divisions to outflank and overwhelm British defenses. His ultimate goal was to advance towards Alexandria and capture the Suez Canal, key to controlling the region.
The German forces, equipped with Panzer III and IV tanks, initially held a tactical edge in desert combat operations. However, they faced significant logistical challenges, particularly in maintaining supply lines, which hindered a sustained offensive.
Despite their initial push, Rommel’s forces struggled to breach the British defensive line at El Alamein. The Luftwaffe’s superior aircraft technology initially supported Rommel’s advances but ultimately failed to secure a decisive victory due to strategic missteps and the resilience of Allied air forces.
The Initial German Assault and British Defense
As dawn broke on July 1, 1942, the German assault on El Alamein commenced with tanks from the 15th and 21st Panzer Divisions pushing towards the crucial Ruweisat Ridge.
German forces launched an artillery bombardment aimed at weakening the British defenders’ fortifications. Despite being outnumbered, British defenders, armed with two-pounder anti-tank guns, engaged German tanks at close range, inflicting damage.
On July 2, the German forces breached the outer defenses, leading to intense combat in the “Hotbox,” where the 1st South African Brigade fought valiantly. Heavy casualties occurred, but a British counterattack, bolstered by the 22nd Armoured Brigade, helped halt the German advance. This fierce resistance stabilized the front and set the stage for future battles.
Key Engagements and Turning Points
The fierce resistance by British forces during the initial German assault set the stage for important engagements and turning points in the First Battle of El Alamein.
On July 2, the British Eighth Army, under General Auchinleck, launched counterattacks to regain essential positions, including Ruweisat Ridge. This ridge was critical for both observation and defense.
Despite the German offensive’s intensity, British defensive positions, bolstered by minefields, managed to slow the Axis advance. By July 21, the Eighth Army successfully repelled a significant German offensive, marking a pivotal turning point in the battle.
Although they suffered approximately 13,250 casualties, the British halted the Axis advance just 106 kilometers from Alexandria, buying valuable time to regroup and prepare for future operations.
The Role of Ruweisat Ridge in the Battle

Ruweisat Ridge played an essential role in the Initial Battle of El Alamein, emerging as a focal point for both British and Axis forces.
From its heights, you’d grasp why British forces, including the 1st South African Brigade, fortified it. With defensive advantages, they maintained critical observation over Axis advances.
On July 1, 1942, German tanks from the Afrika Korps tried breaching these defenses, aiming to exploit their position. Despite heavy casualties, the British effectively employed anti-tank guns and coordinated counteractions to halt Rommel’s forces. The failure of Axis forces to secure Ruweisat Ridge considerably impacted the battle’s outcome. This setback depleted their resources, forcing Rommel to reconsider further offensives, marking a turning point in the struggle for North Africa.
Aftermath and Impact on the North African Campaign
Following the intense struggle at Ruweisat Ridge, the aftermath of the Initial Battle of El Alamein became a significant turning point in the North African Campaign. You’d see how the stalemate halted the Axis advance towards Alexandria, letting British forces regroup. Despite heavy casualties—about 13,250 for the British and 17,000 for the Axis—the battle’s outcome lifted Allied morale. It demonstrated that the Axis weren’t invincible, marking a crucial moment in World War II.
The fierce engagements at El Alamein were reminiscent of the Mighty Eighth Air Force‘s relentless bombing campaigns that aimed to dismantle enemy capabilities. By securing essential supply routes and strategic locations, the British prevented the Axis from seizing control of Egypt. This defense set the stage for future offensives, including the decisive Second Battle of El Alamein, ultimately shifting the North African Campaign in favor of the Allies.